Nginx的安装与初步使用
1. Nginx简介

Nginx (engine x) 是一个高性能的HTTP和反向代理web服务器,同时也提供了IMAP/POP3/SMTP服务。Nginx是由伊戈尔·赛索耶夫为俄罗斯访问量第二的Rambler.ru站点(俄文:Рамблер)开发的,第一个公开版本0.1.0发布于2004年10月4日。
其将源代码以类BSD许可证的形式发布,因它的稳定性、丰富的功能集、示例配置文件和低系统资源的消耗而闻名。2011年6月1日,nginx 1.0.4发布。
Nginx是一款轻量级的Web 服务器/反向代理服务器及电子邮件(IMAP/POP3)代理服务器,在BSD-like 协议下发行。其特点是占有内存少,并发能力强,事实上nginx的并发能力在同类型的网页服务器中表现较好,中国大陆使用nginx网站用户有:百度、京东、新浪、网易、腾讯、淘宝等。
2. Nginx的安装
2.1 Linux环境
直接yum命令安装即可,不用下载源码编译
1 | 在阿里云的控制台直接yum安装即可 |
其他安装方法可参见菜鸟教程
安装完成之后可以通过如下命令来验证是否安装成功
1 | #查看Nginx版本 |

2.2 Windows 环境
在Nginx官网下载Windows版本软件包。

3. Nginx的配置文件
Nginx的配置主要是修改nginx.conf文件,手动安装的在安装目录下面,自动安装的在/etc/ngixn目录下面。
1 | # 修改配置文件 |
Nginx的默认配置文件:
1 |
|
重点需要关注其中的server配置:
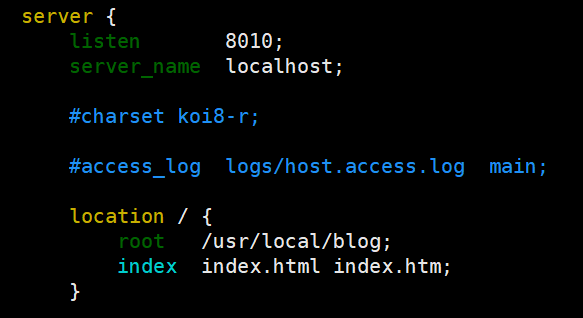
listen就是访问端口,默认80,我这里修改为8010;server_name是服务名称,可以写自己的域名,我这里填写本地localhost;location是指定资源名称,其中root是指定主页目录地址,index指定主页文件名称,这里配置的可以是index.html或者index.htm。
4. 启动Nginx,访问页面
在启动Nginx前需要通过名称验证配置文件是否正确
1 | # 验证配置文件 |
启动nginx,启动之后就可以通过地址和端口好访问查看nginx是否已经配置成功
1 | # 启动nginx |
5. Nginx的其他常用命令
1 | # 重新载入配置文件 |